07 March 2019

Long time no see

I just noticed that it has been more than three years since I posted the last time. So here’s something I spent my time with since then. At least lately. I found a motif on Pinterest and turned it into a sweater.
This is my Shetland Blues:

After kind of blood, sweat and tears I had a final result yesterday. And I‘m rather proud of it. So here are some of the steps of the way I got there.
Last year I spent two weeks in Shetland  knitting and hiking and had a wonderful time. That’s where I got my yarn - Croft Shetland Tweed from Jamieson and Smith plus Double Knit from Uradale yarns so it had to be a special project. Then I stumbled over an interesting motif on Pinterest. After some brainstorming I just took my knitting needles and took off, rather naively.

The pattern

First pattern part

Knitting in the round, holding the colors left and right. It worked out quite well. I added the steek for the armholes and switched the colors in the upper part, let the pattern fade away nearing the neckline.  


So far so good.
Then I discovered that the armholes were way too big and the sleeves would be kind of bat wings which wasn't what I had intended. 
After circling around this „thing“ for days I knew I had to change something.I took it apart at the middle of the pattern after the color change.
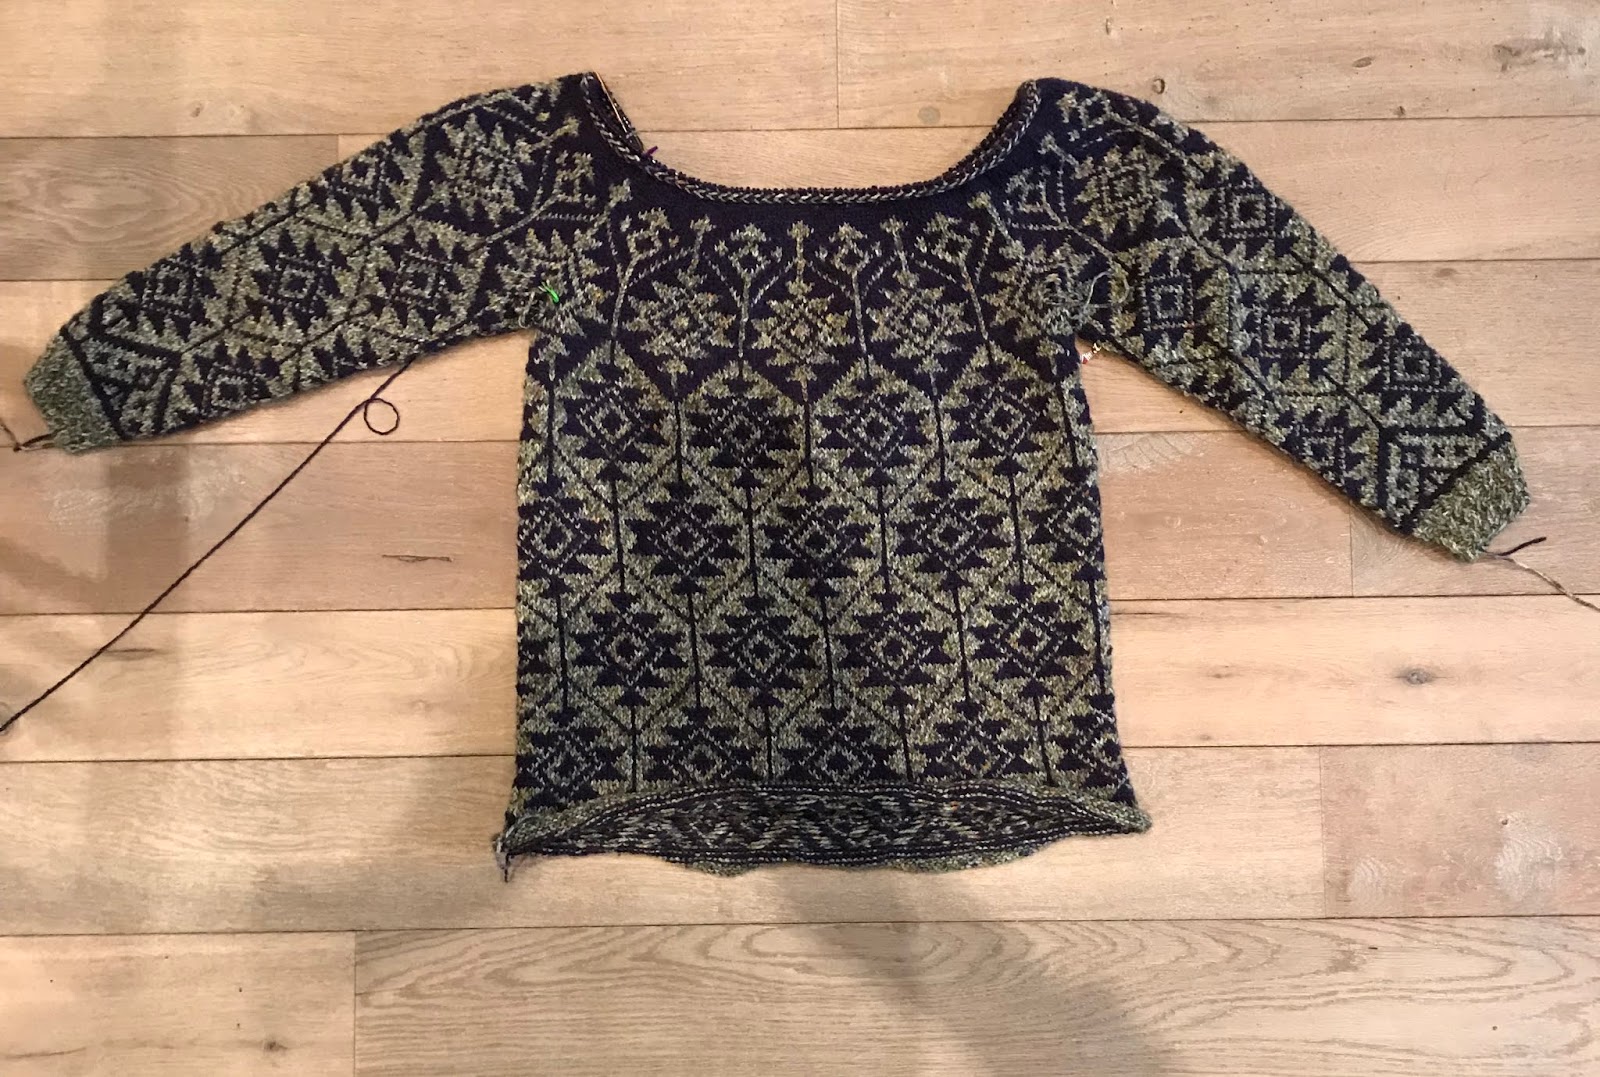


Separations
The idea was to change this to a yoke sweater with the sleeves continuing the pattern after being inserted. Well, that proofed to be not so easy. When I did the first one and had the pattern drawn out and colored I didn't notice that half of the motif was missing. The finished sleeve fitted perfectly into one side but not onto the other. So I ripped it. Actually I did four sleeves in the end. The first before I got the insight to make a yoke sweater, the second that was ripped and the two fitting ones. Hah!
To be on the really safe side I made the drawing of the complete sleeve. 


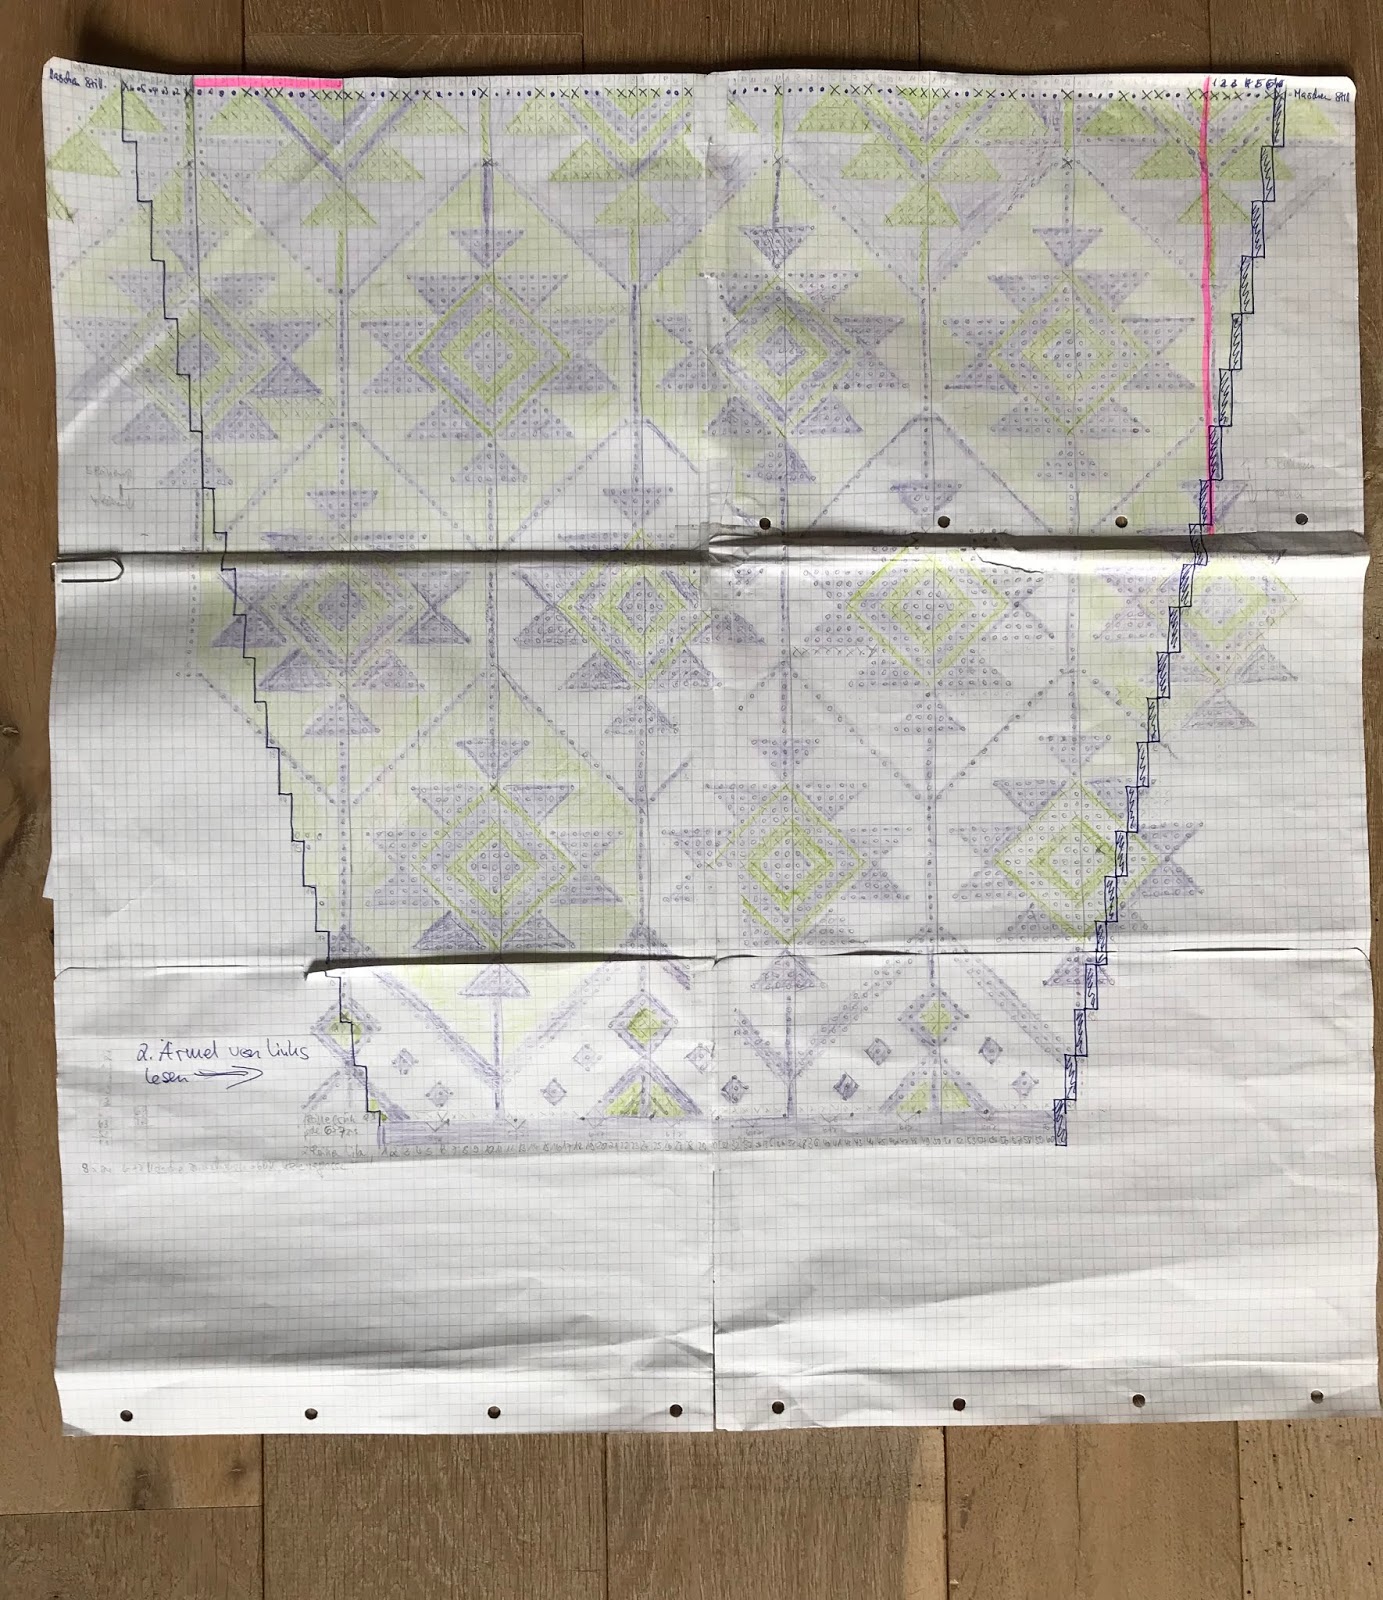
This time it worked correctly. 

 
The next thing was to work out how to get the needed decreases for the yoke. I liked the previous idea with letting the pattern fade which helped with the yoke decreases, too. A braid and a crocheted slipstich line around the neck looked good. The back of the neck is higher because I added some short rows. I changed the bottom to a braided rib band and here it is in all its glory. What an adventure this was and it is going to continue, since there is still that seperated top plus one sleeve to turn into something wearable. Do I need to tell that I ran out of yarn again 😂

See you!


03 September 2015

Good Bye

Today I had to part from a longtime companion in my life, the last of my pets my late husband and I shared. Baby the cat isn't here anymore. She was 18 and a half year old, was never ill and now had develloped a fast growing lung cancer. She was a wonderful little cat and loved our dogs. Farewell! You'll never be forgotten.
She had a very personal definiton of cozy places


06 August 2015

A Wedding Quilt

It's been a while but I was busy. There was the class with Jane LaFazio "Designs from Life", the heat outside with something about 40° C and just a few other things. BUT now the new video of Jane came out "Wet Felting Essentials". Watched it with itchy fingers, collected my felting stuff (plus some new tools) and got started. That was fun!!!
This is what it looked like after it was dry and before I started embellishing:


And then I got creative and wild:
I haven't decided yet wether I add a background fabric or leave it like this. It has a story anyway. Working on it I thought of  the ancestors I found when I did some research. There are some that are 6 generations back. They got married March 10 in 1744 in Tüllingen and some years ago I had the chance to look into the parish register when I was doing some family search. The picture I took of the matrimonial record was printed on fabric and then added in pieces to the felt and I stitched their names on the top right side of the piece. So here is the post-mortem wedding quilt.
Closeups:


16 June 2015

FI-NA-LLY!!

My long term babyquilt for my partner's grandson (his mother calls me Grandma #3 :-)) is finally ready to be given away. There are some minor details that would'nt win any prices but counting in the fact that my sewing studio is still under construction, I did have my Bernina but on a narrow table that started to jump every time I sewed to fast plus that chair I sat on was way too low it's an achievement and I'm satisfied with it.


Now I can finish the next one - those little birds. They have to be quilted and a binding added.


Plus I'm working on a small piece with design motives from the new lesson "From the Sea" (Jane LaFazio). This was my page:
The motive of the snail shell on the left side made a little design on fabric on its own, I made stamps and stencils from all of them and I'm pretty curious what the result will be in the end.


I had some trouble with the lesson before "From the mountain" with my drawing of a beech nut that was absolutely ugly. But with the help and inspiration of Jane all turned out well and now I can look at the page with content :-) Here is before and after:


Beechnut in center too dark
What a difference a cone makes ...
This was the  second try on the pod theme:

There are lots of ideas and designs I'll keep from this class to use and to devellop further.

07 June 2015

The last three

All birds are decorated. Only number 19 waits for its legs, they will reach onto the binding. Now the little quilt needs to be finished off - if I can get around to it as it's really hot at the  moment and my sewing machin is way up under the roof ... By the way, that green something at the top is a grasshopper under construction, I wonder what it will look like when it's done.


This is my arrangement for lesson 3 "from the factory/garage" with Jane LaFazio. Very different from drawing tomatoes but lots of fun!


25 May 2015

Number 17 and 18, tomatoes and garden life

Needless to mention that it's raining again. But before that I managed to plant some vegetables in my garden on Friday, started lesson 2 of  "Designs from Life" and finished two more birds.
Here are some impressions from the garden:


These are finished number 17 and 18:


Last but not least this is my tomato page:

I will doodle with the shapes for design some more to carve more stamps once my supply arrives ...

21 May 2015

Stitching, sketching versus garden ...

Due to the changing weather I do have to set priorities and that's for today to earth up my potatoes and come back for number 17 later. There are also flowers I want to draw before the next lesson starts tomorrow. Sounds like stress? Not really, I'm still having fun - except for the snails who were the first ones to discover the ripe strawberries. But I got most of it!! That's the delicious time of the year.

Number 15

Number 16
Five more to go.

Here's the second flower attempt, I have to do some more doodling for getting design elements from it. Going from realistic to abstract is really difficult for me.